The article shows you a short, calm at-home routine to release tension in the neck, shoulder, and chest and support your horse’s forehand.
Table of Contents
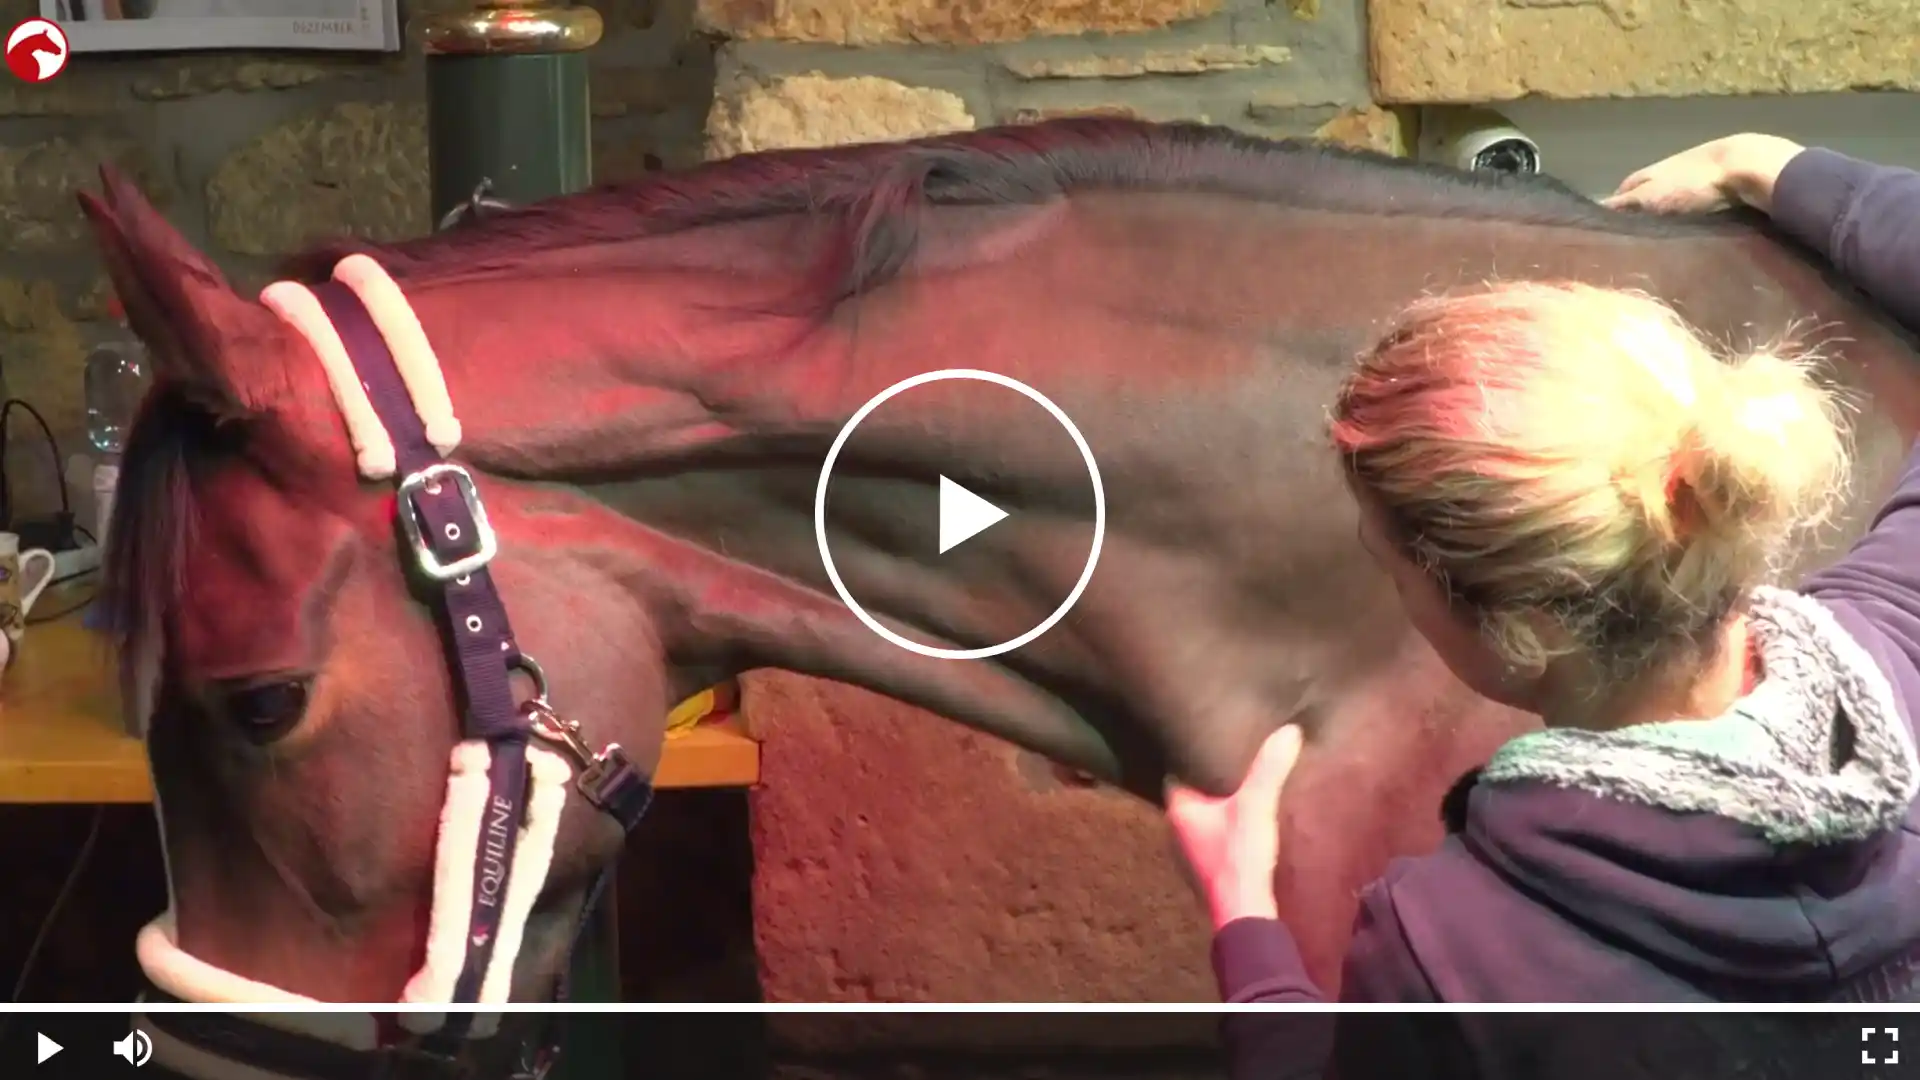
🎥 Video tip: Relaxation for the horse’s back – these exercises can help!
In our ClipMyHorse.TVAcademy, you’ll find an exclusive premium video on this topic that explains the routine in a comprehensive and expert way and provides valuable tips. The Academy offers access to professionally produced, practice-based expertise—ideal for anyone looking to deepen their training skills in a targeted way.
A relaxed neck and shoulder area is key for allowing the forehand to move freely. If the muscles there are tight, the “energy” often goes down into the ground instead of forward and up—and that can put unnecessary strain on tendons, ligaments, and joints.
Important note on performing the exercises:
Do all exercises slowly, carefully, and with feel. The aim is to relax the muscles. The exercises shown are not a substitute for professional physiotherapy treatment. If the horse becomes unwilling or appears sensitive or painful during the massage, a physiotherapist should be consulted.
❗ Important notice: Stop the exercise immediately if any of the following signs occur
• Suddenly throwing the head up or clearly avoiding
• Painful reactions to light pressure or if the situation escalates
Important: The horse should lower its head independently – never pull the head down using the halter.
Exercises: Step-by-step explained
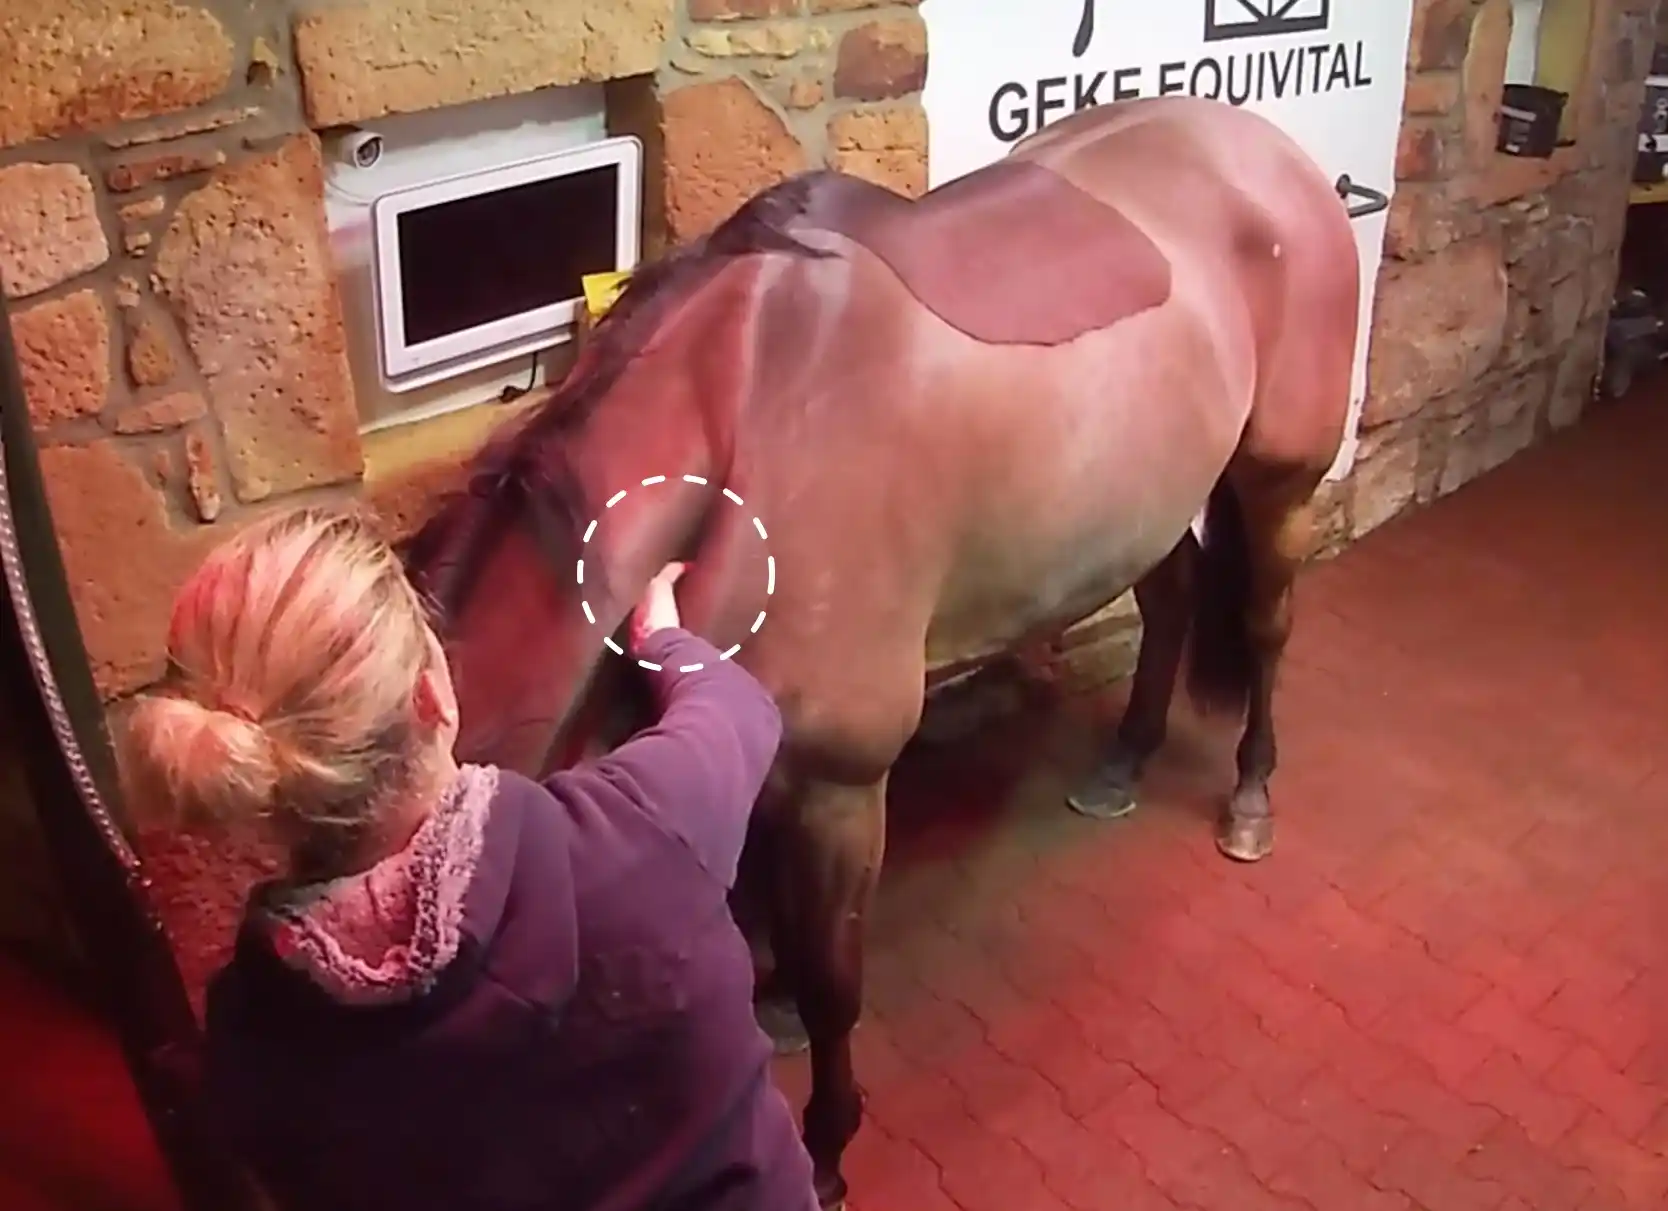
Loosening the neck–shoulder muscle
Goal: Release tension from the large muscle band between the neck and shoulder so the shoulder blade and forehand can move more freely.
How to do it:
Step-by-step instructions:
1. Stand next to the horse, slightly to the side.
2. Take hold of the shoulder–neck muscle with your whole hand (do not pinch) and gently move it to the right and left.
3. Work through the muscle from top to bottom – always using light pressure.
Good sign: The horse begins to lower its head and neck, becoming softer and more relaxed.
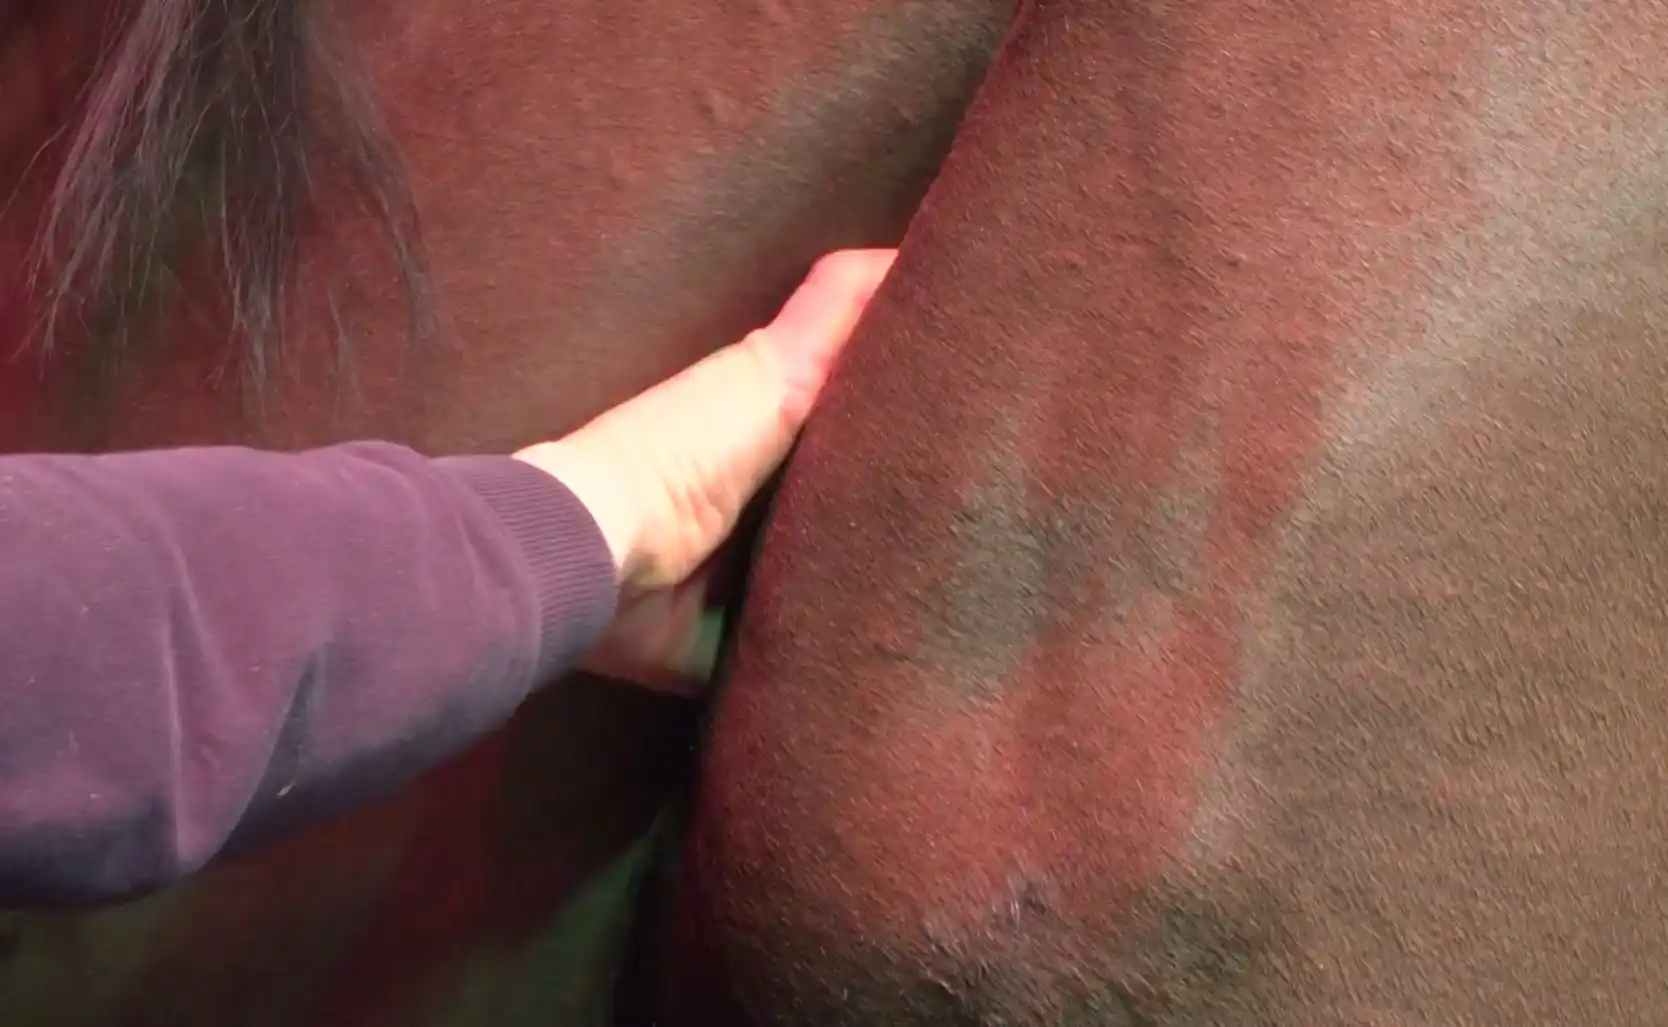
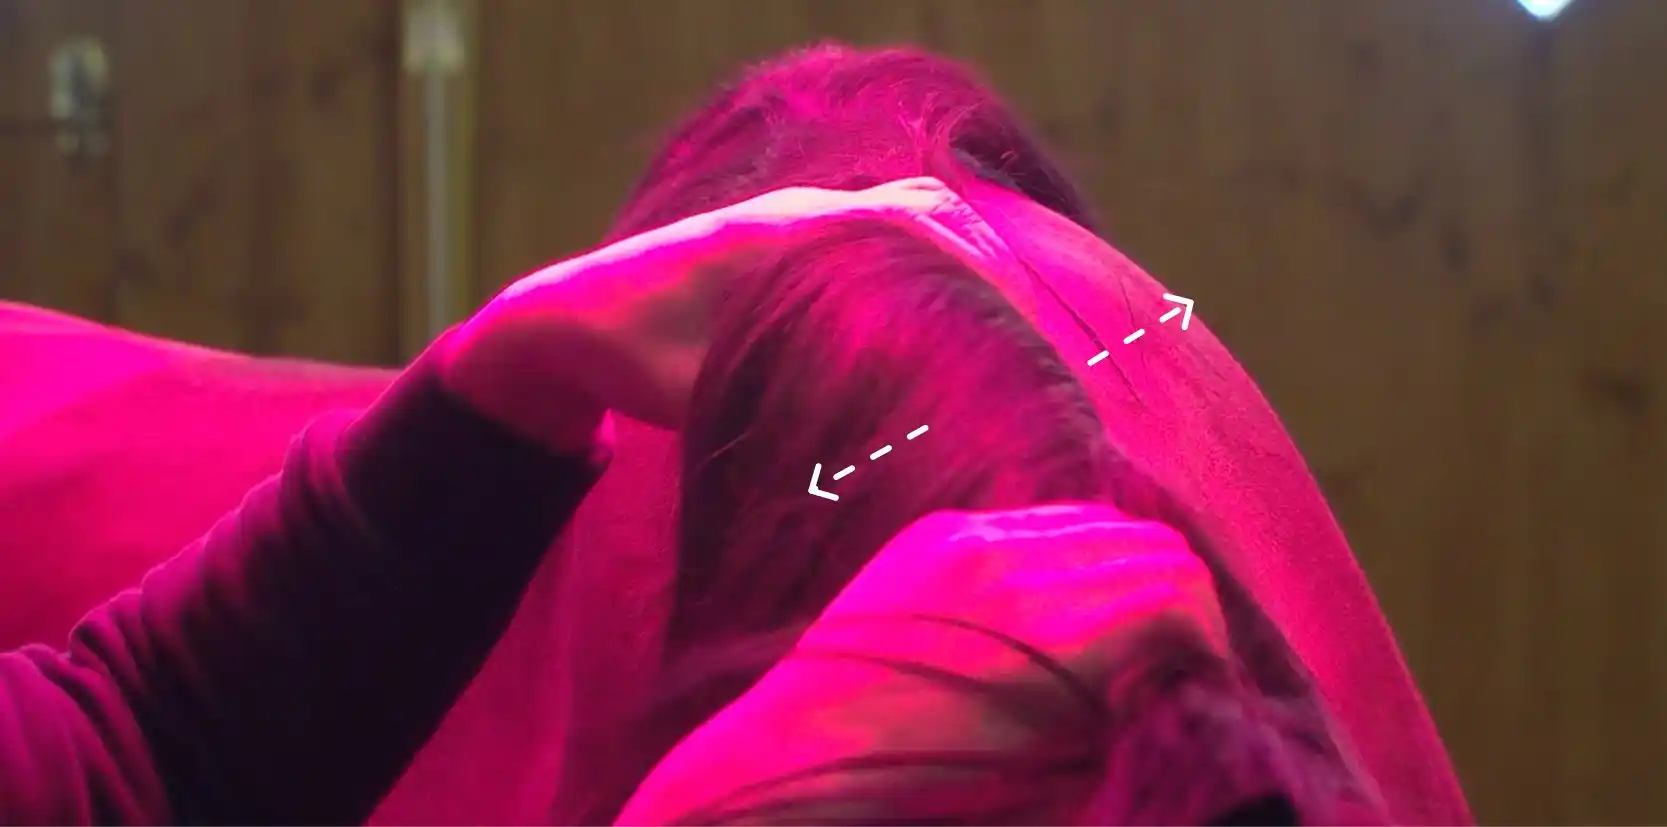
Skin rolling in the neck area
Goal: The skin should shift easily; if it feels tight, this may indicate adhesions.
How to do it:
Step-by-step instructions:
1. Take the skin in the neck/shoulder area gently between your fingers.
2. Gently draw it away slightly or shift it.
3. Pause briefly where the tissue feels tight – without pulling or tearing.
Note: A cracking sound may occur if the connective tissue/fascia is very tight – don’t be alarmed, but always keep your hand soft and relaxed.
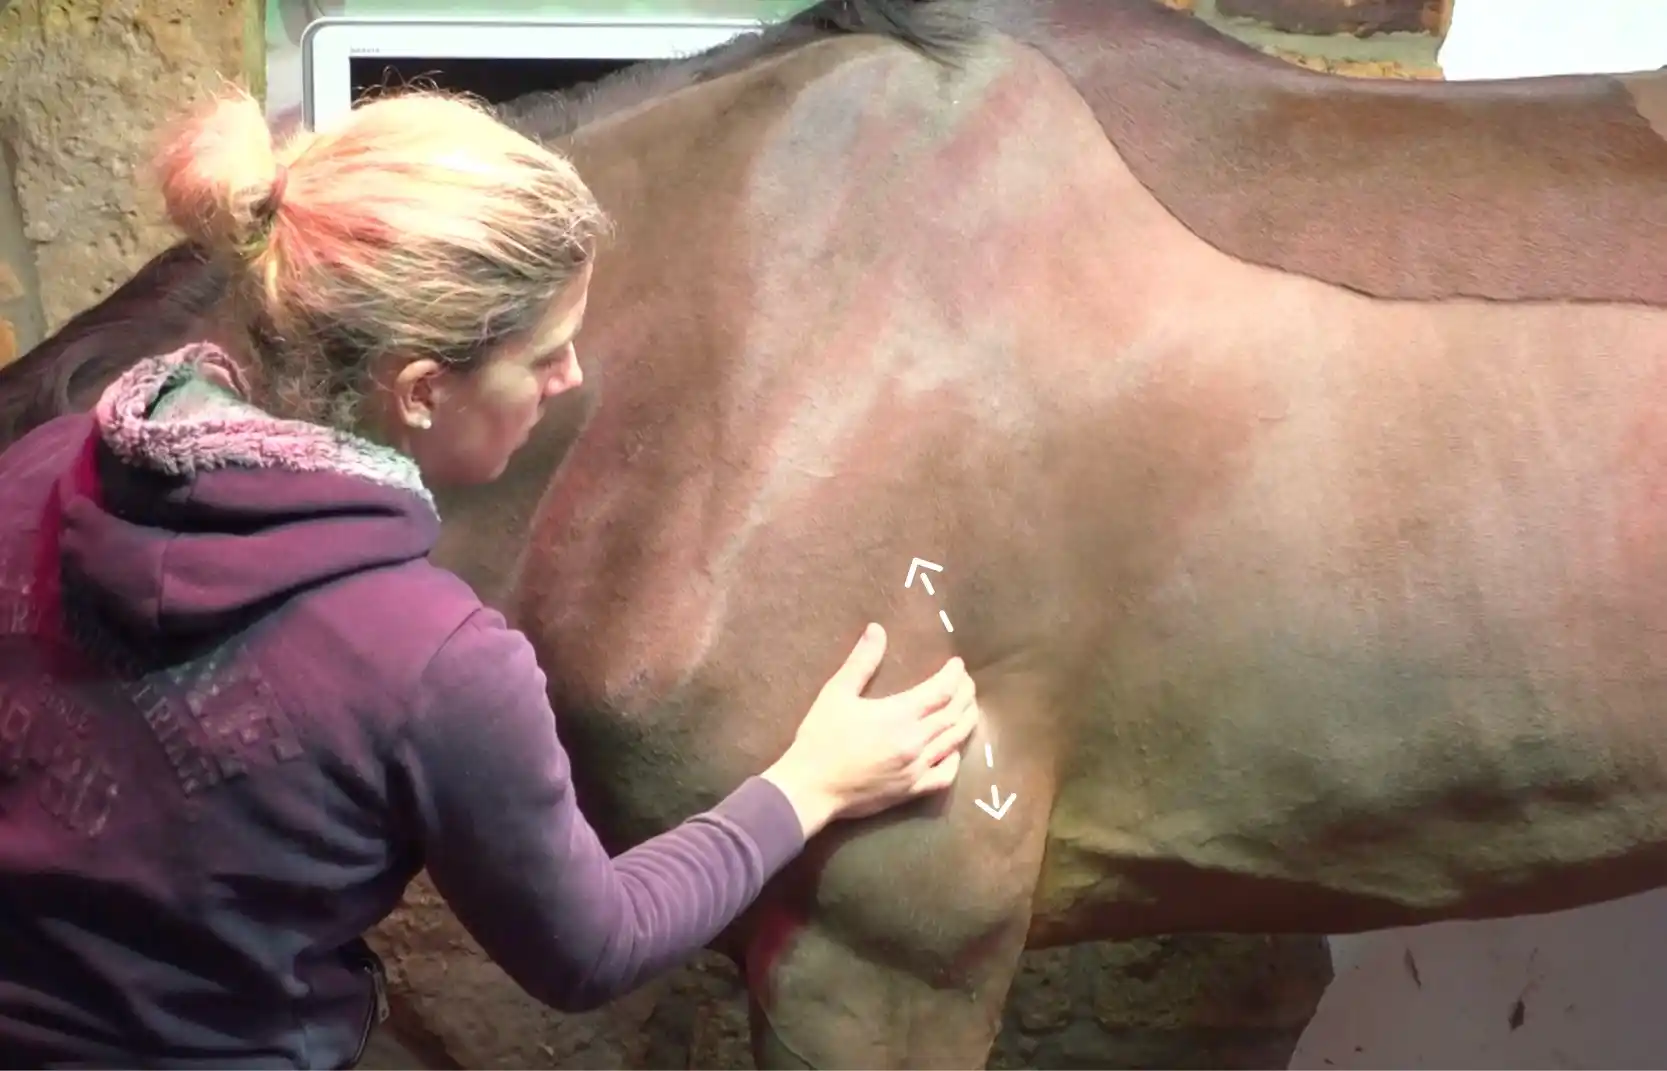
Loosening the shoulder-blade area
Goal: The shoulder blade should be able to move well over the ribcage—this requires the surrounding muscles to be relaxed.
How to do it:
Step-by-step instructions:
1. Gently stroke behind the angle of the shoulder blade.
2. Carefully check whether you can slide your hand behind/under the shoulder blade area.
3. If everything feels very tight there, stick to light stroking only and seek professional support if needed.
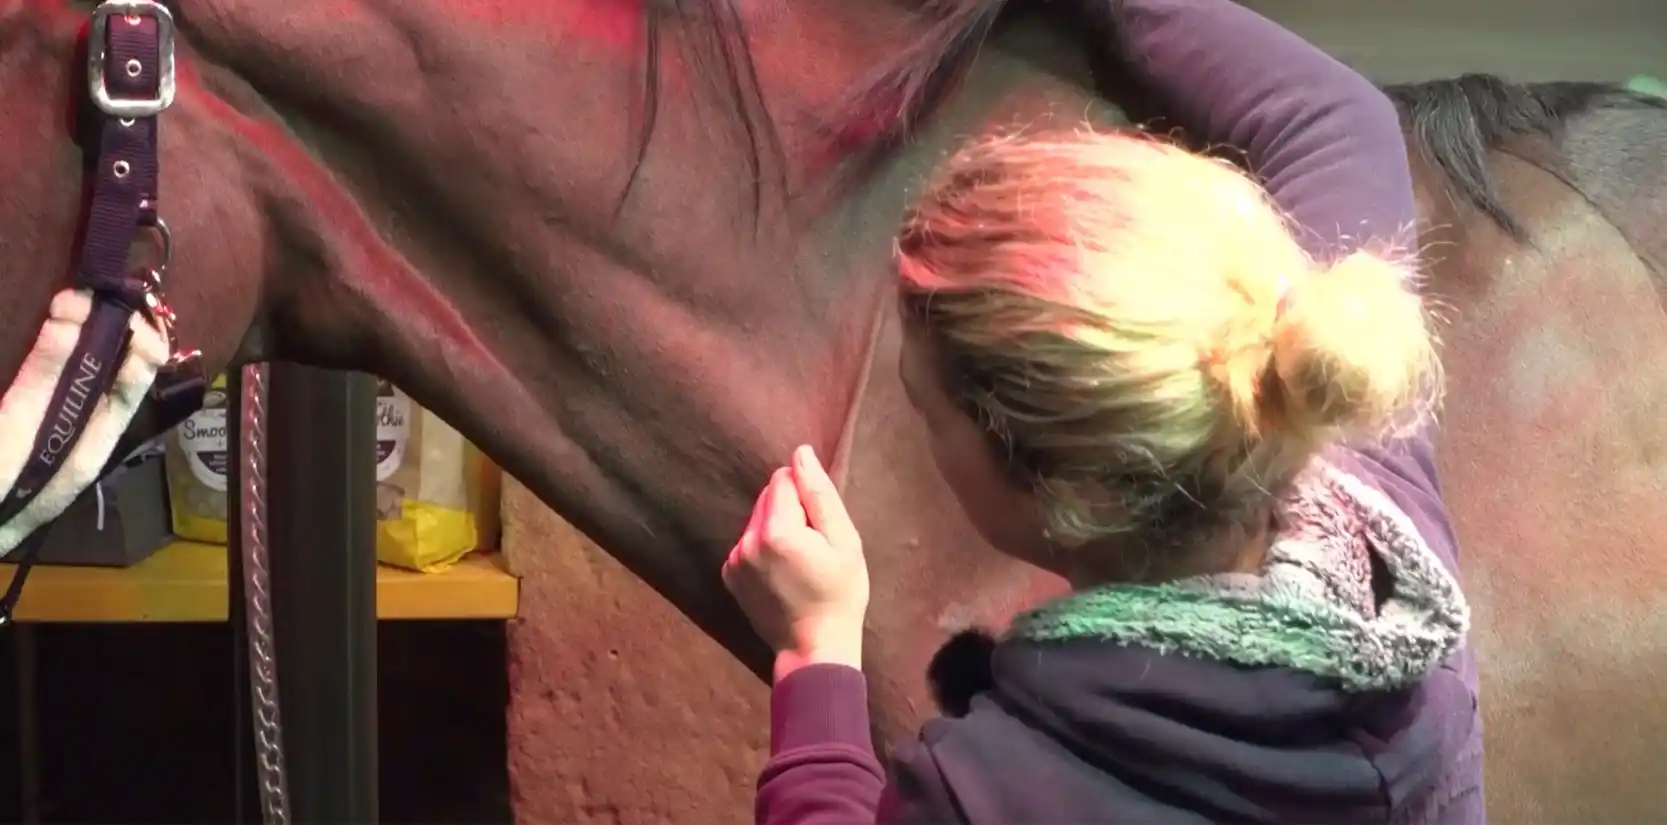
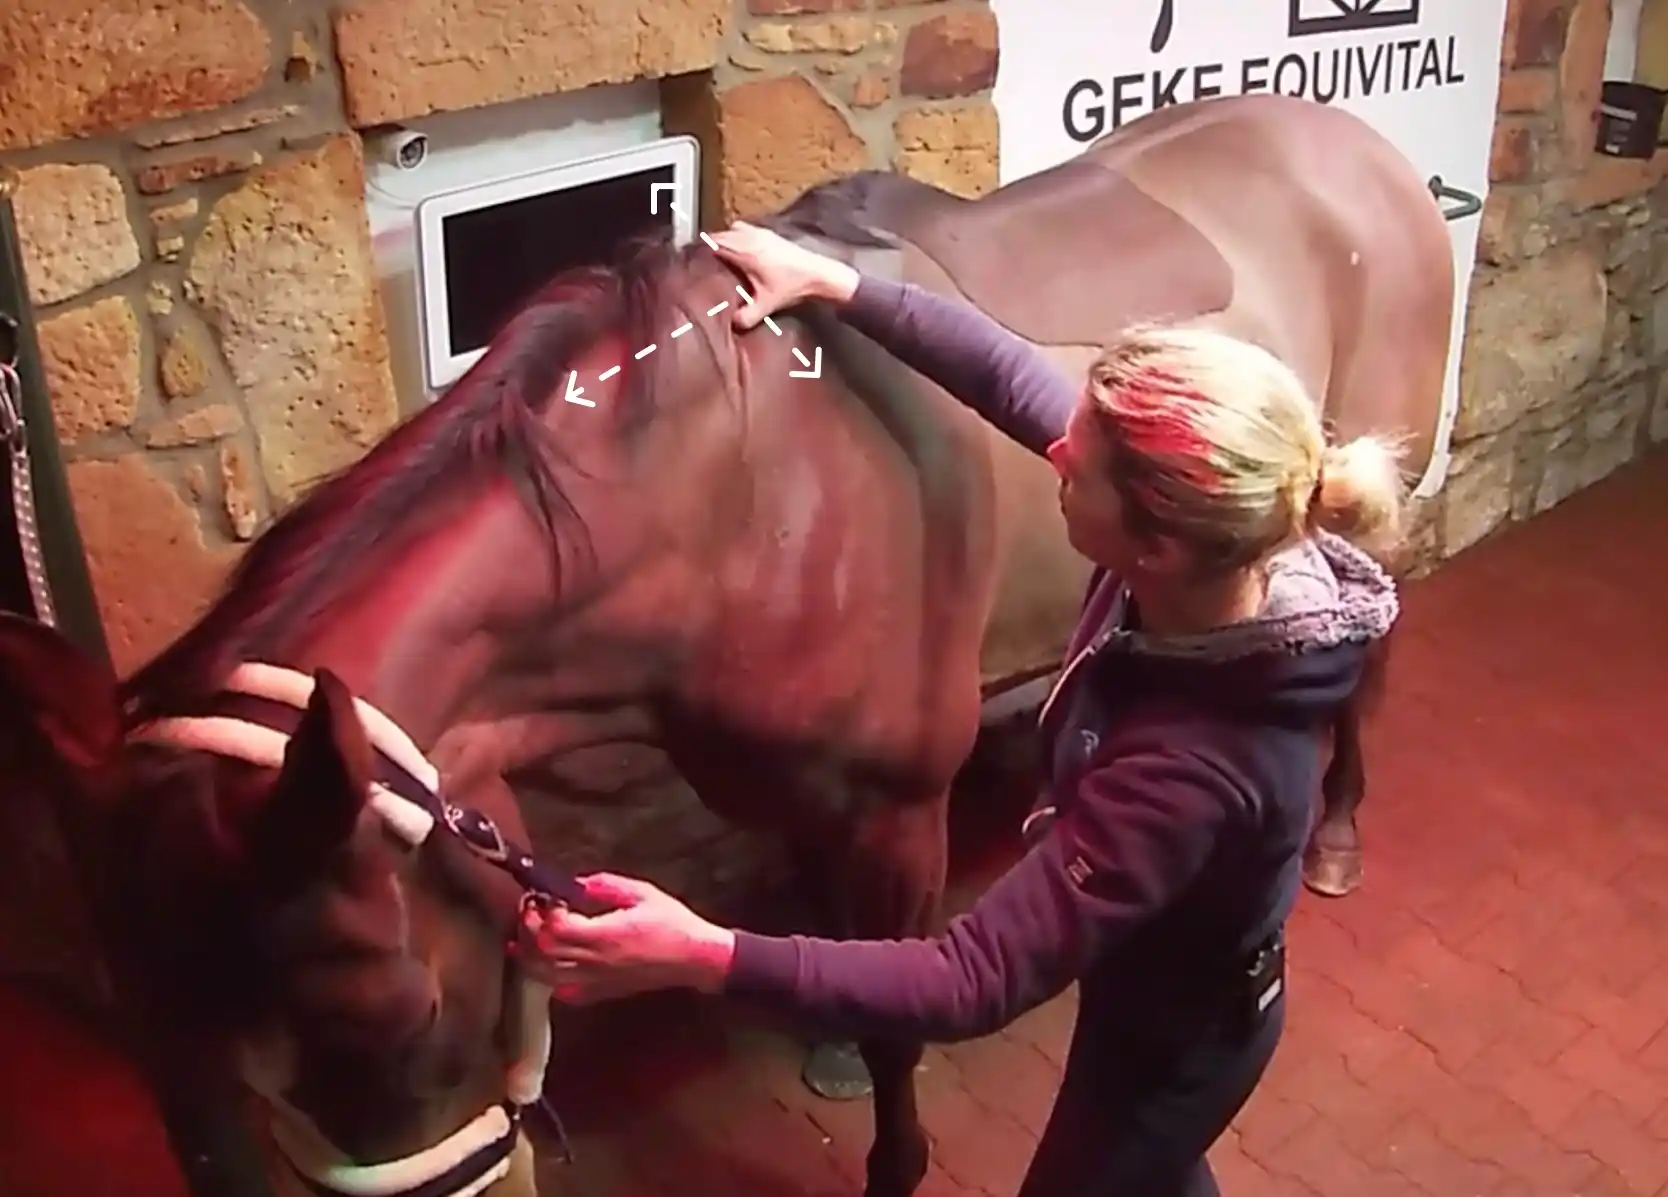
Mobilizing the trapezius muscle & mane crest
Goal: If the area around the withers/upper neck is tight, the neck won’t relax and stretch out from the withers.
How to do it (trapezius muscle):
Step-by-step instructions:
1. Place one hand on the mane crest and gently move the tissue back and forth – if needed, with light, calm kneading.
2. Slowly work your way forward.
Note: Many horses start to chew, lower their head and neck, and appear noticeably softer overall.
How to do it (mane crest):
Step-by-step instructions:
1. Place your flat hand on top of the mane crest – contact only, no pressure.
2. Gently shift the skin and tissue in small movements slightly to the right and left (without pulling or pinching).
3. Notice whether one side moves more easily than the other.
4. Repeat this hand-width by hand-width towards the head.
Stroking along the shoulder blade
Goal: Release the shoulder area so the shoulder blade can “work” more easily over the ribcage.
How to do it:
Step-by-step instructions:
1. Stand calmly at the horse’s side at shoulder height.
2. Place your hand flat behind the angle of the shoulder blade.
3. Gently stretch the tissue upward and downward – do not rub the skin, but move the underlying tissue with your hand.
Important: Observe the reaction: the horse should become softer and tend to lower its head – not avoid the contact.
Positive signs: Chewing, blinking, calmer breathing, a more relaxed shoulder/chest area.
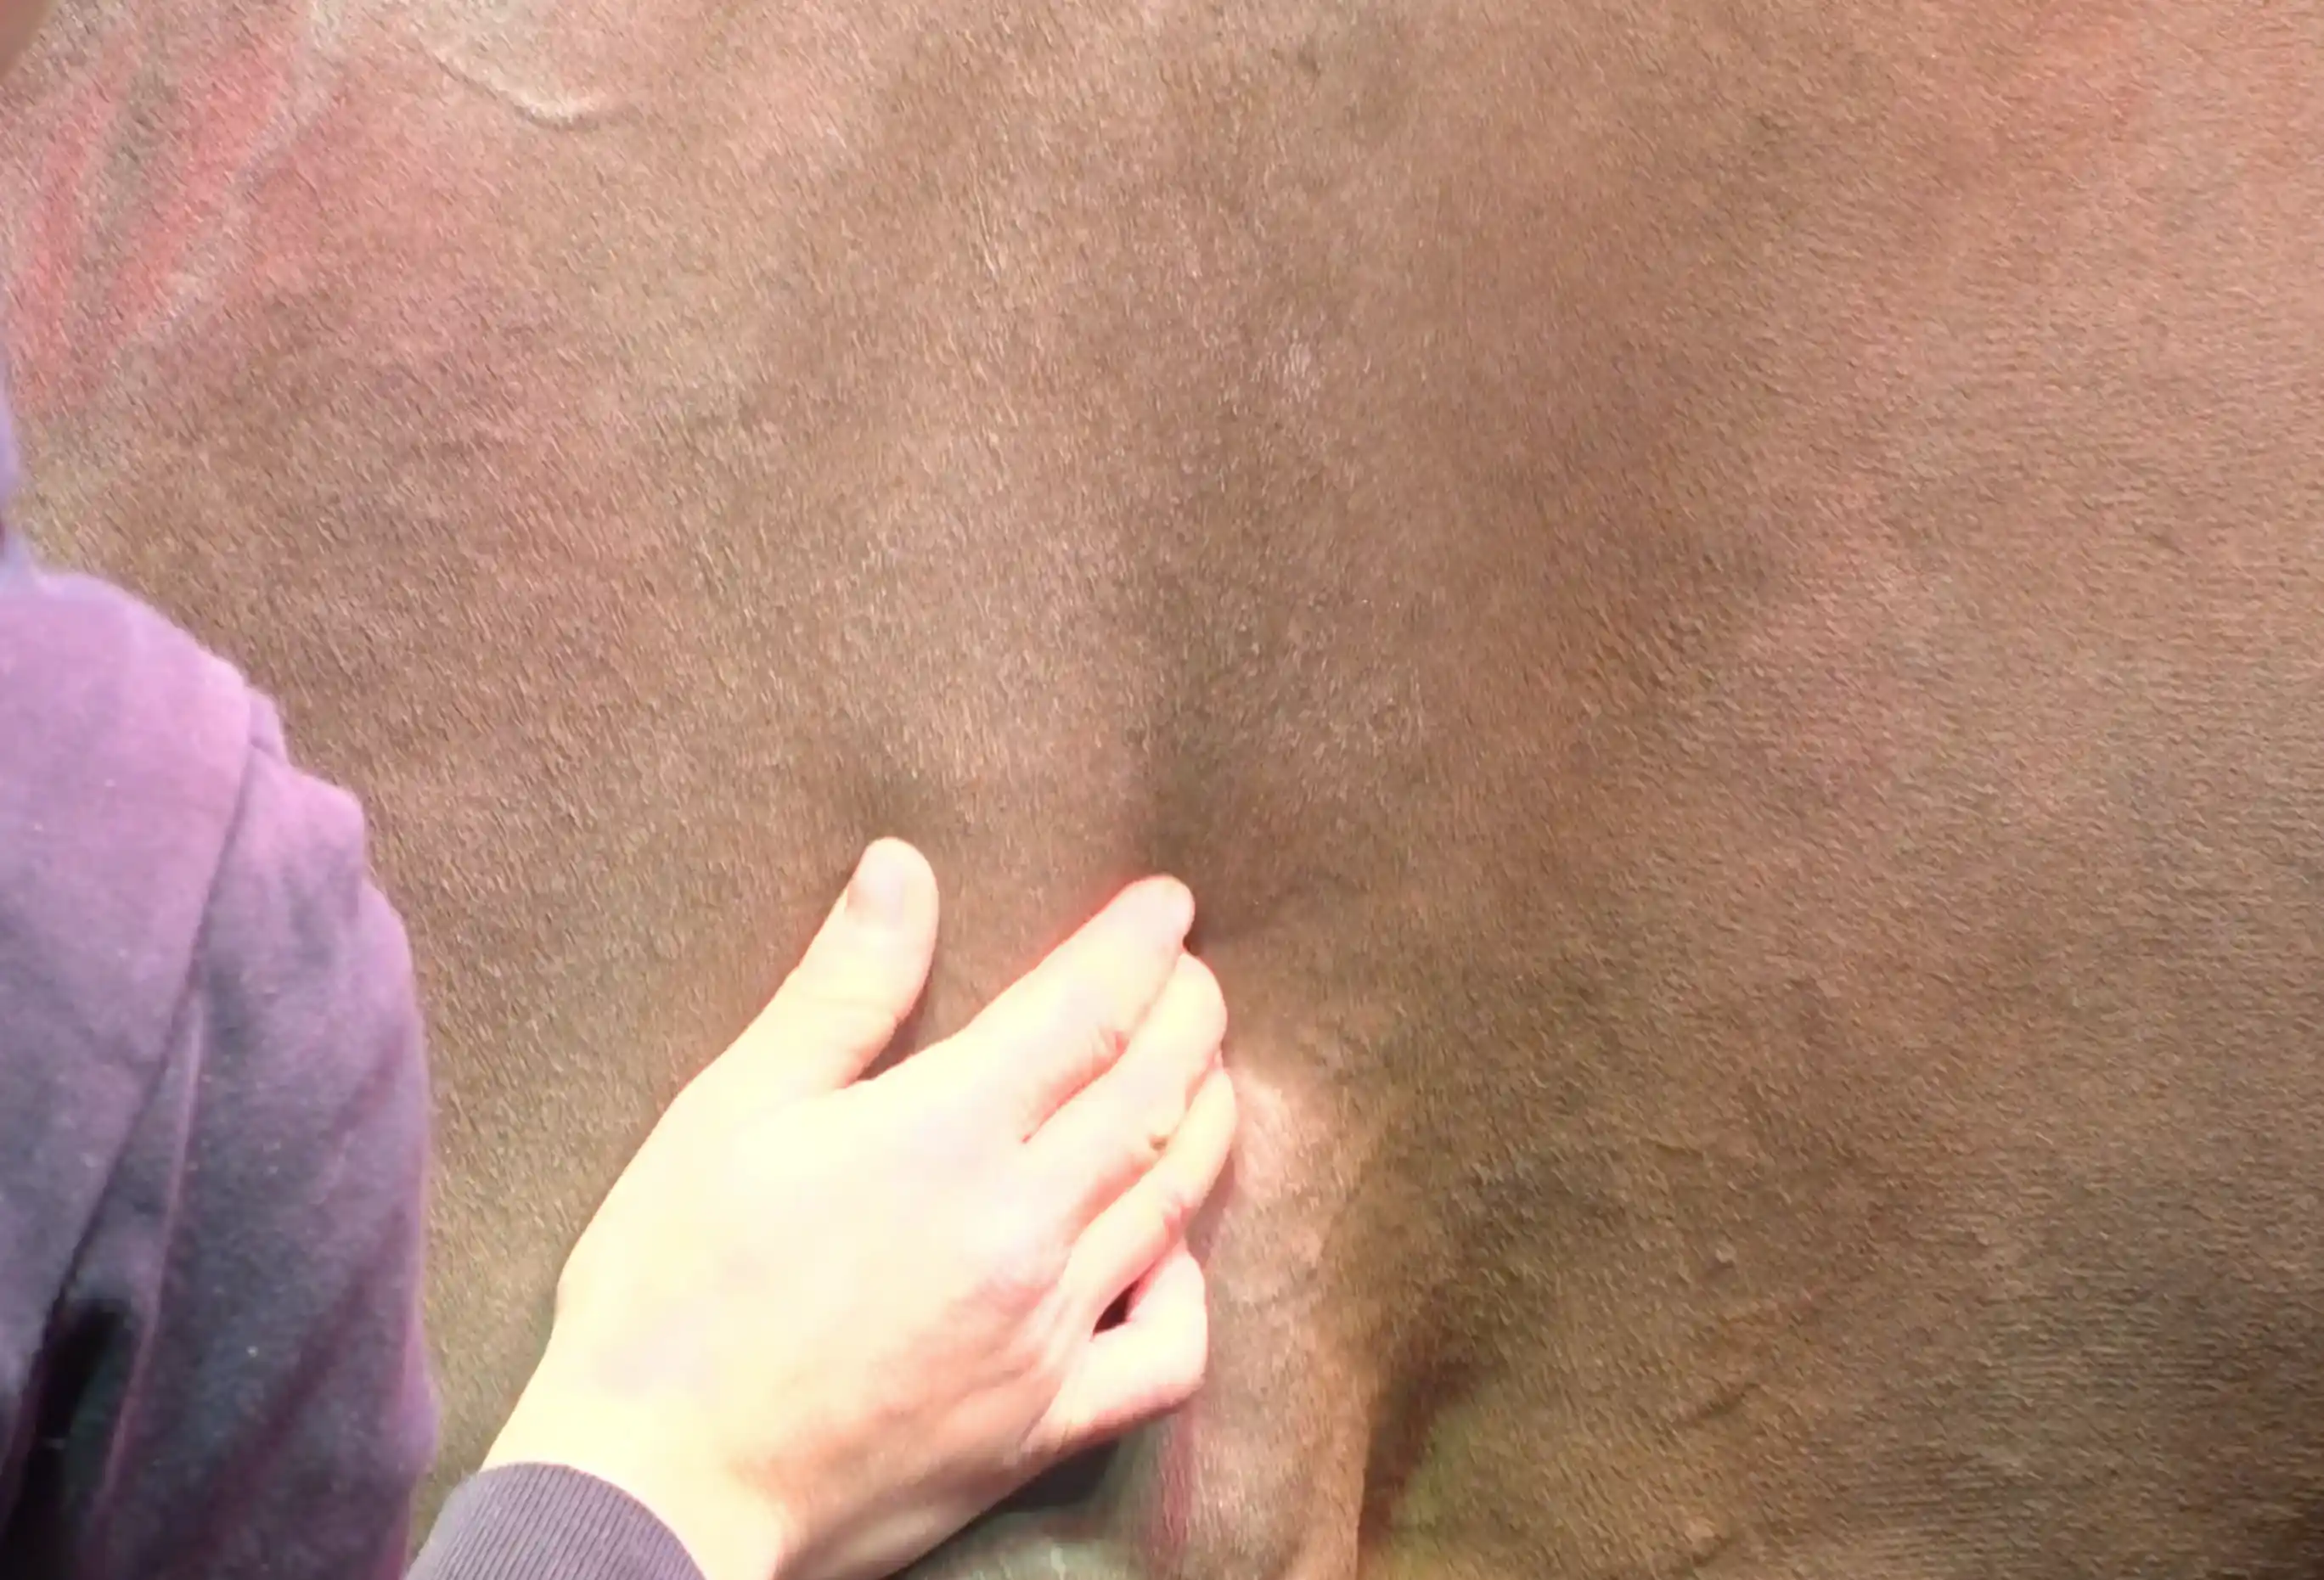
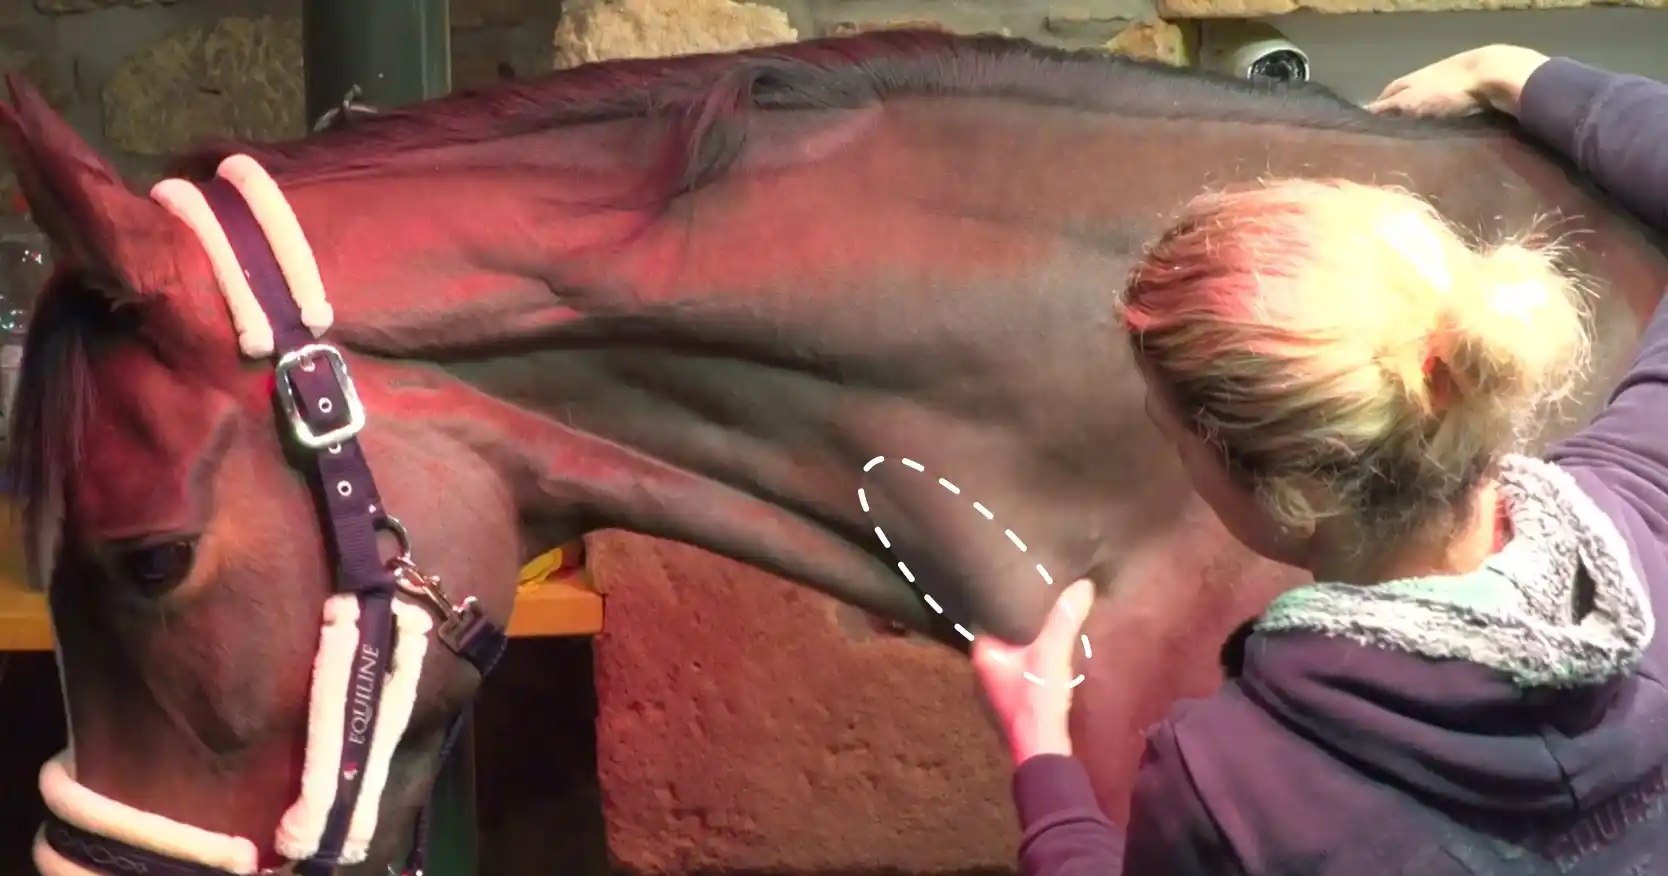
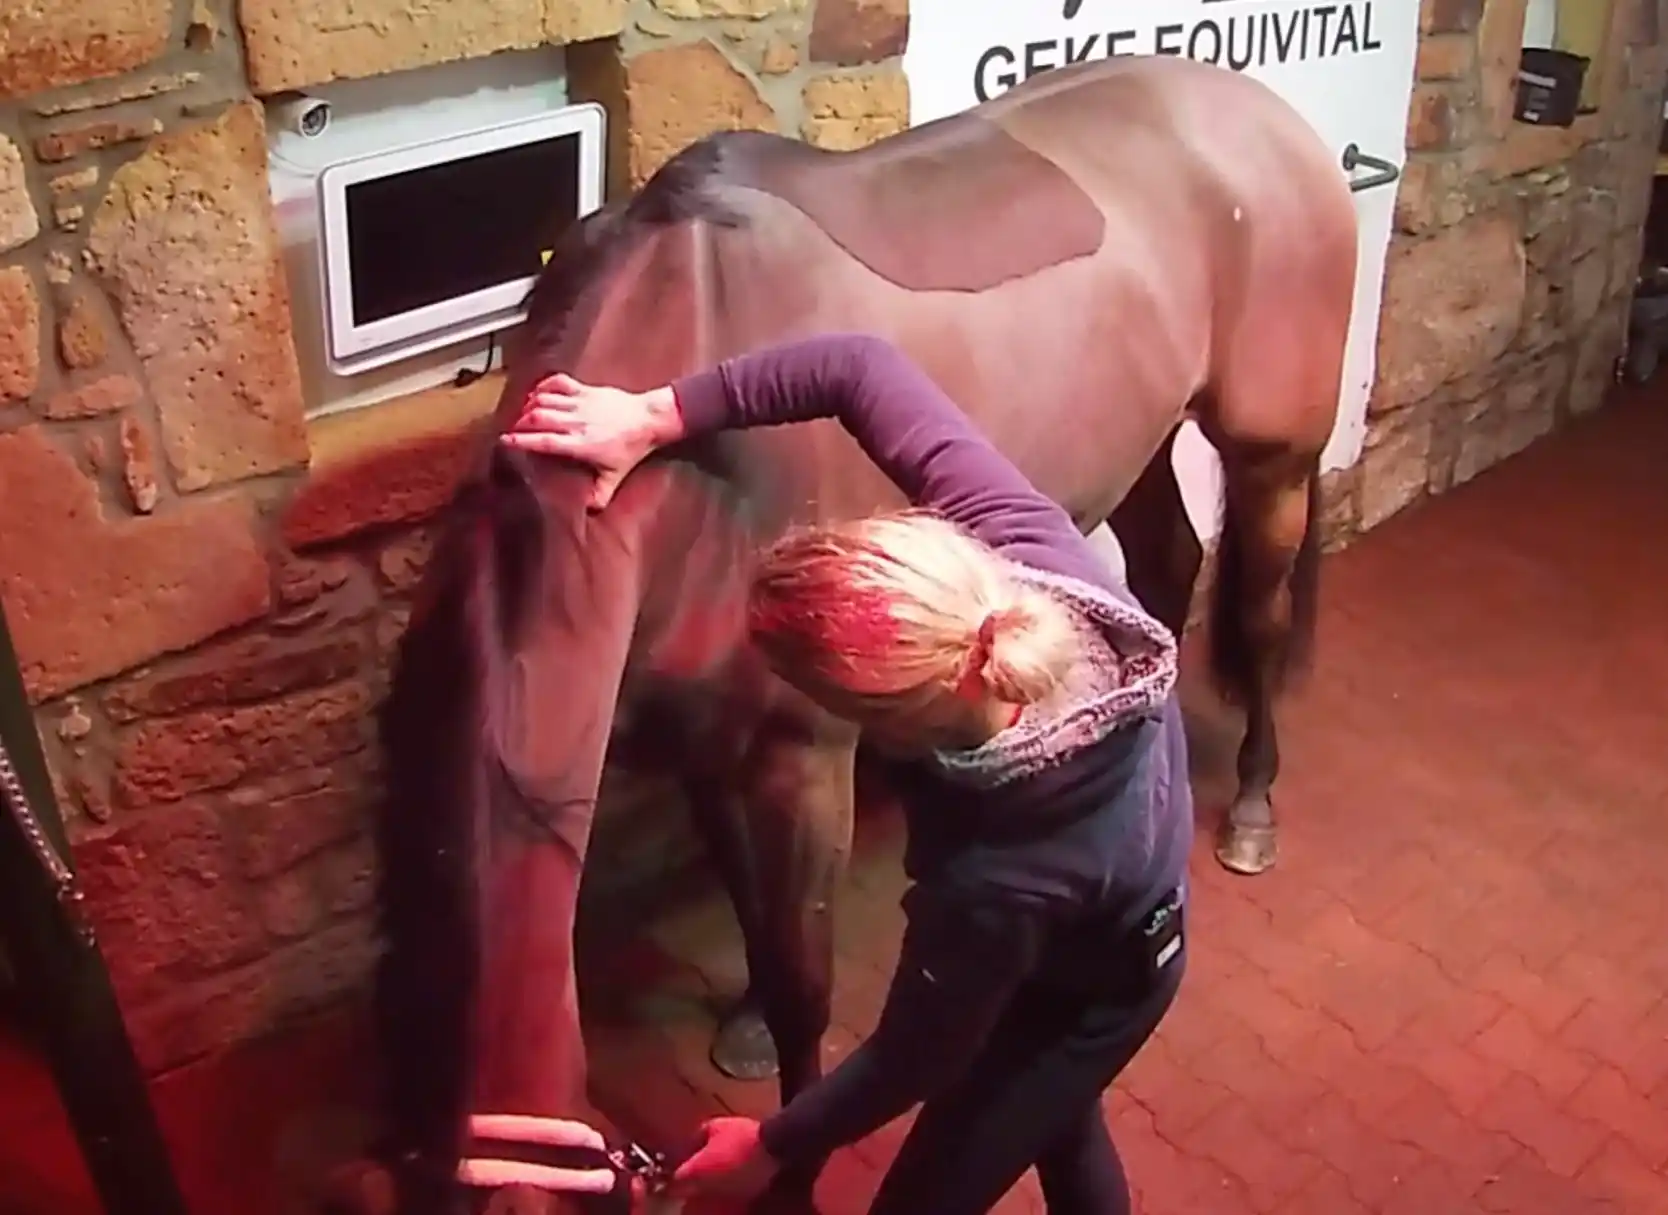
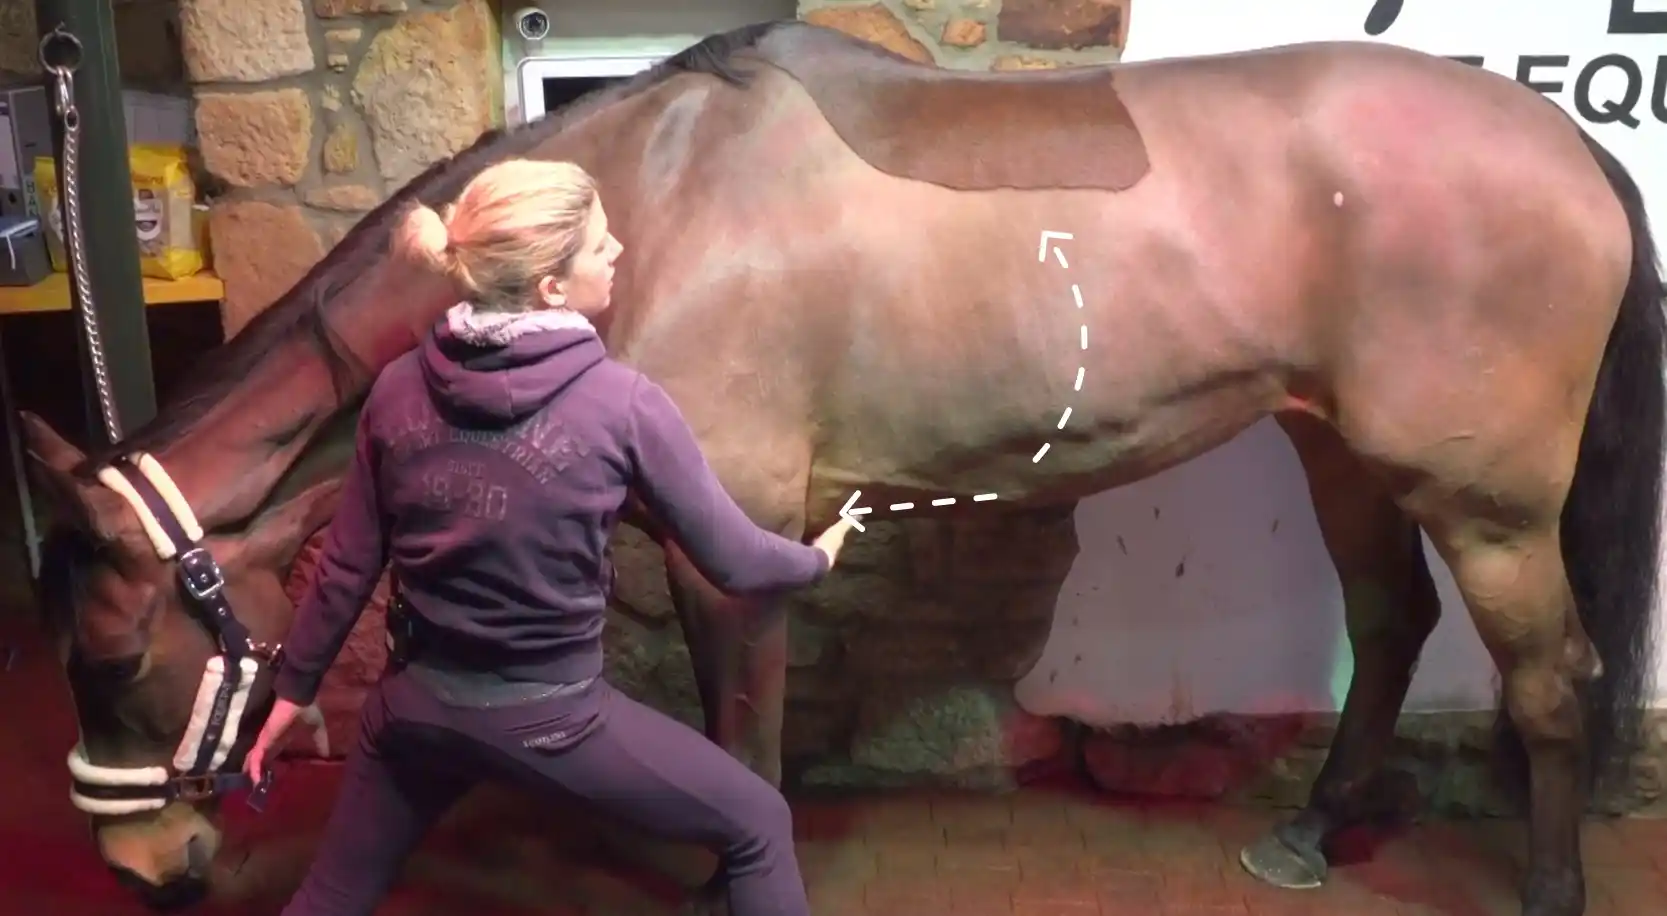
Stroking along the sternum & “lifting” the back
Goal: Activate the abdominal muscles—this can help the back release more easily and lift.
How to do it:
Step-by-step instructions:
1. Prerequisite: The neck remains lowered – this is the key.
2. Place your fingers between the abdominal muscles at the breastbone and stroke along the breastbone forward towards the head.
3. As you do so, gently lift the tissue upward with your fingers, as if you were slightly “lifting” the trunk through the back.
If the head comes up: briefly release, let the neck lower again, then continue with gentle stroking.
You can tell it’s working when: the oblique abdominal muscles visibly engage and the back lifts slightly.
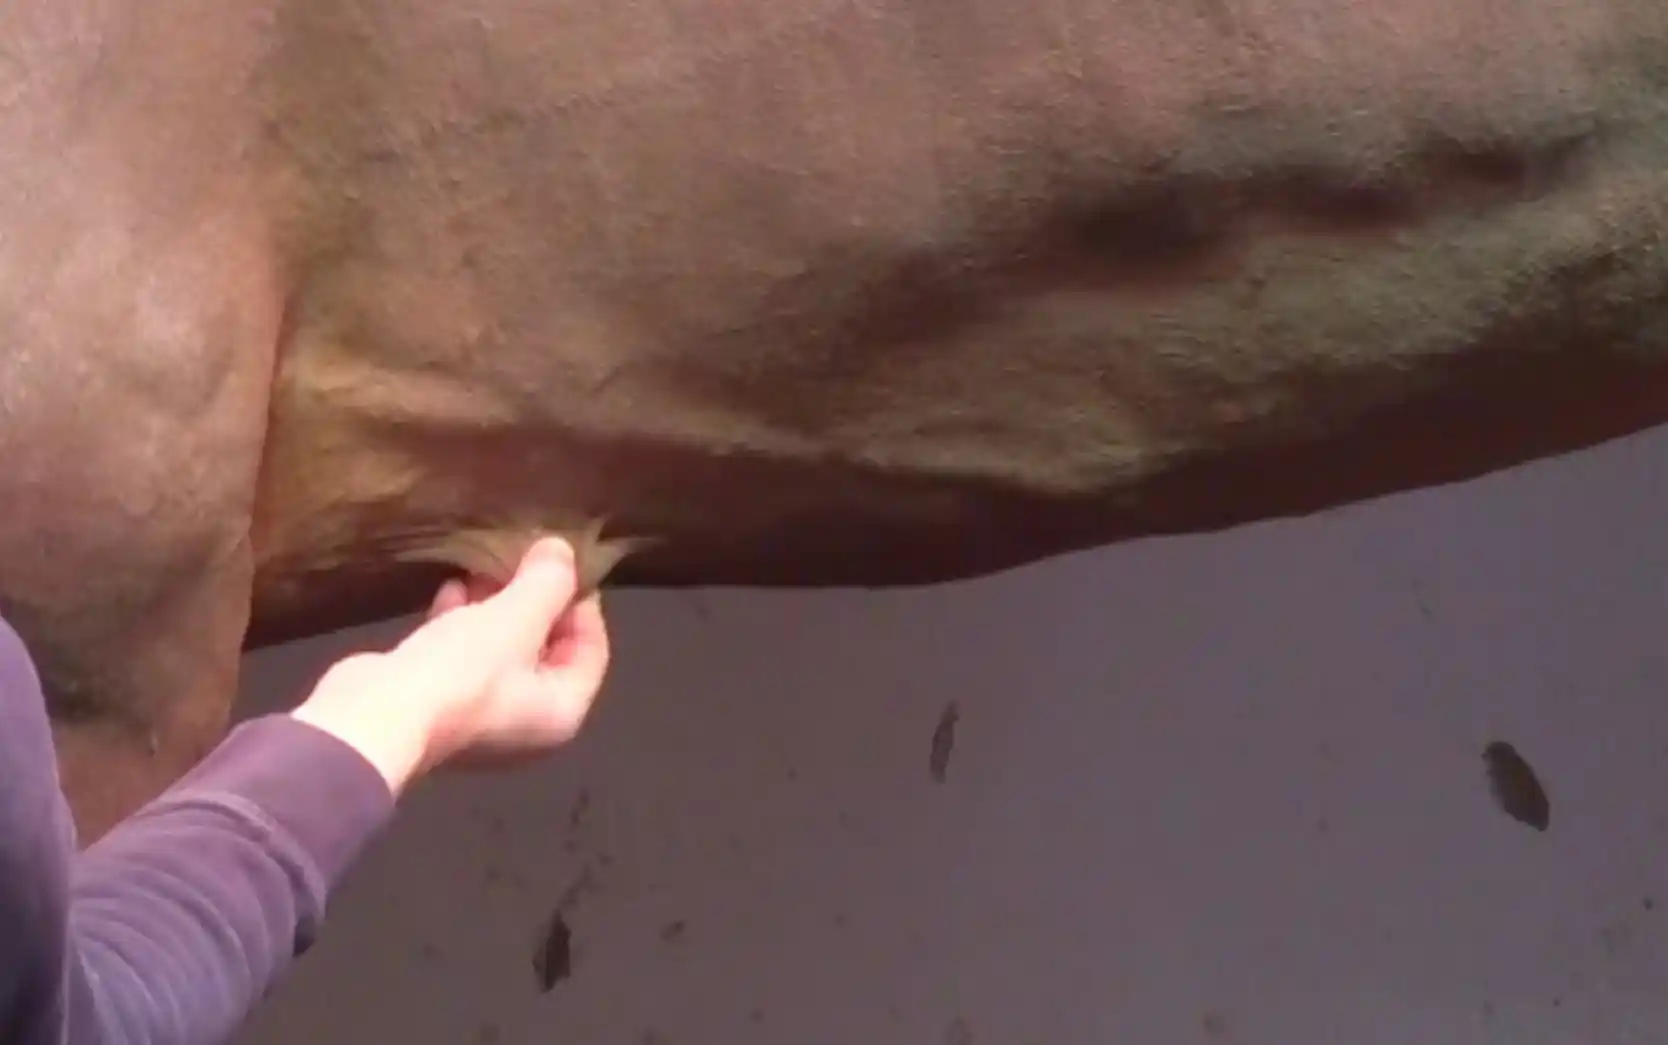
Girth area: Skin rolling
Goal: Especially in the girth area, the skin/connective tissue is often less mobile.
How to do it:
Step-by-step instructions:
1. Gently take hold of the skin in the girth area and shift or lift it slightly – without pulling or tugging.
2. Afterwards, return to a few calm, gentle strokes.
Conclusion
A relaxed forehand usually doesn’t start “down at the legs,” but higher up in the neck, shoulder, and chest area. When the muscles and fascia there can glide more freely again, the horse often gains more shoulder freedom, feels lighter in the hand, and can carry the movement forward more easily overall.
The exercises are deliberately simple—but that’s exactly where their effect lies: when used briefly, regularly, and gently, they can noticeably relieve the forehand and create a foundation for better training and healthier loading.