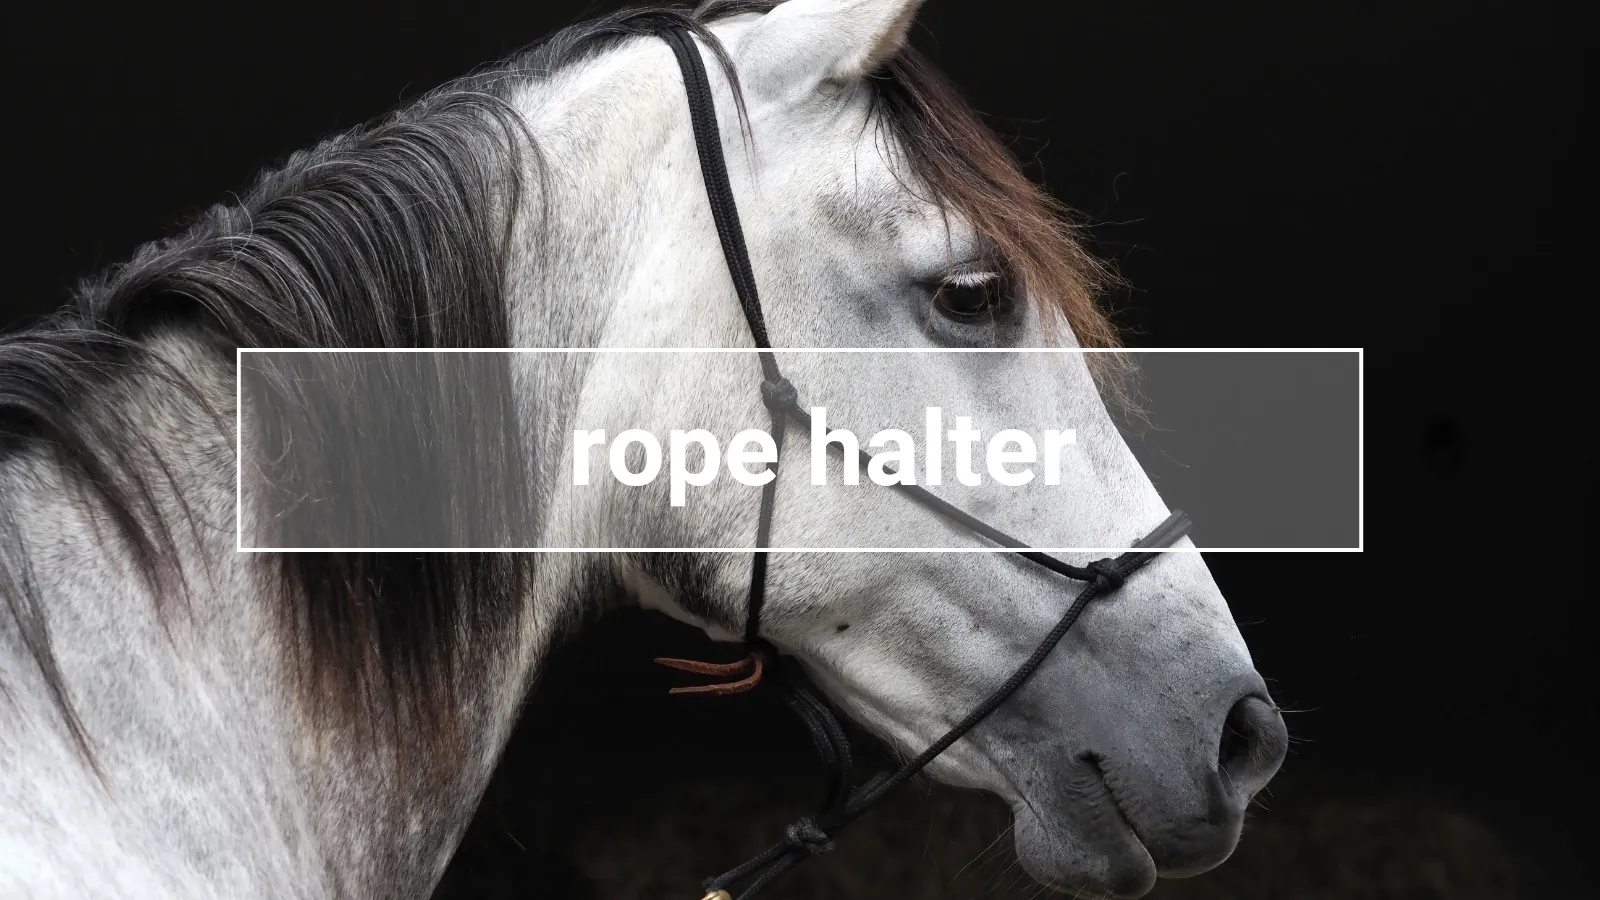
Rope Halter – Function, Use, and How to Make One Yourself
The rope halter is more than just a simple piece of tack – when used correctly, it becomes a sensitive tool for communication between horse and human. It responds to the slightest movement, fosters attentiveness and respect, but requires sensitivity and knowledge. Learn how it works, how to fit it properly, and how you can even tie one yourself.
Table of Contents
The rope halter is much more than just a simple piece of rope – when used correctly, it becomes a sensitive communication tool between human and horse. It responds to the slightest movement, encourages attention and respect, but requires a thoughtful, knowledgeable approach. Here’s how it works, how it should fit, and how you can even tie one yourself.
What is a rope halter?
A halter horse rope is made from a single piece of rope, without metal parts or padding—pure and minimalist. The horse rope halter fits snugly around the horse’s head, with knots strategically placed at pressure points like the nasal bridge, poll, and chin. This allows for finer and more immediate signal transmission than with a standard stable halter.
The horsemanship halter and rope comes from Western riding and natural horsemanship, where trainers like Pat Parelli used it for groundwork. Today, it’s used across disciplines—especially for groundwork and trail training.
How does a rope halter work?
Its effect is based on localized pressure. When you pull the lead rope, pressure is transmitted through the knots—your horse feels even small movements immediately. This encourages focus and responsiveness.
Why is a rope halter considered "sharp"?
Because the thin rope concentrates pressure in a small area. The thinner and stiffer the rope and knots, the more intense the effect.
What does a rope halter do for the horse?
It makes subtle cues noticeable—ideal for training reaction speed and attentiveness when used with a calm hand and clear body language.
When should a rope halter not be used?
Rope horse halters don’t have a breakaway function. If the horse is tied and panics, it can’t break free. Therefore:
- Never tie a horse with a rope halter.
- Never longe with it.
For those situations, use a stable halter or a cavesson.
How to properly fit a rope halter
Correct fit is key for both safety and comfort:
- Noseband should sit about two fingers below the cheekbone.
- Side knots must be symmetrical.
- Leave about two fingers of space between rope and head.
- The throatlatch must not be too tight.
A halter that’s too low can press on sensitive nerves, while one that’s too high loses its effect. Use a rope halter size chart or measuring guide to ensure the right fit.
.png)
How to make a rope halter – Step-by-step guide
If you like DIY projects or want a custom fit, you can make a rope halter yourself. It's cost-effective and can be tailored to your horse.
Materials:
- 6–8 m of rope (6–8 mm diameter, e.g., cotton, polypropylene, paracord)
- Scissors or knife
- Lighter to seal the ends
- Measuring tape
- Optional: size chart for reference
Instructions:
Step 1: Take measurements
Use a tape to measure your horse’s head and mark it on the rope. Approx. 7.5 m for a large horse, 5.5 m for a pony.
Step 2: Create the base shape
Shape the noseband, cheekpieces, and poll strap. Mark knot positions.
Step 3: Tie the knots
Use symmetrical Parelli knots—typically on each side of the nose, under the chin, and behind the ears. Use a double overhand knot to prevent slipping.
Step 4: Tie the throatlatch loop
Run the rope under the jaw and form a small loop for closure.
Step 5: Secure the ends
Trim excess rope and melt the ends carefully with a lighter.
Step 6: Check the fit
Place the halter on your horse and check for correct fit, knot placement, and freedom of movement. Adjust if necessary.
Which rope is suitable for a rope halter?
Ideally, choose a round, firm, lightweight rope with a smooth surface. Paracord is popular—it’s durable, colorful, and comfortable to handle. Avoid stretchy ropes, as they reduce effectiveness.
Rope halter with reins and lead rope
Some riders also use the rope halter for riding. There are versions with built-in rein rings or directly attached reins.
For groundwork, choose a matching lead rope—about 2–3 meters long, preferably with a panic snap or carabiner.
What’s the correct fit?
A rope horse halter should fit snugly but comfortably. Loose halters shift; tight ones press on nerve pathways. Refer to a size chart and check the fit regularly—especially with DIY halters.
Is a rope halter better than a standard halter?
Not necessarily—they serve different purposes:
- For training, groundwork, and subtle cues: yes.
- For tying, transport, or pasture use: no.
It’s a supplemental tool, not a replacement.
Alternatives to rope halters
If you want refined communication without the risks, consider:
- Sidepull: evenly distributes pressure over the nose.
- Cavesson: ideal for lunging and gymnastic groundwork.
- Bitless bridle or Hackamore: for bitless riding with various pressure points.
Conclusion: A subtle tool that requires responsibility
A rope halter is a precise communication aid—nothing more, nothing less. It allows soft, clear signals when used with sensitivity, knowledge, and patience. If you tie it correctly, ensure a proper fit, and read your horse well, it can help build an exceptionally fine connection.
Rope Halter: FAQs
How much rope is needed to make one?
Between 6 and 8 meters, depending on the horse’s size.
Why is it considered sharp?
Because it applies pressure in specific spots, which can be uncomfortable if misused.
Why not tie with a rope halter?
It lacks a breakaway feature—serious injury can occur in case of panic.
How does it work?
It allows precise cues by applying targeted pressure.
How do you tie a rope halter?
Using symmetrical Parelli knots, even rope tension, and proper positioning on the noseband.

